You firstly need to add a second location before adding the second iPad. A location is typically an entry point to a campus or building (for example Front Reception or Rear Entry). A Site can have multiple Locations.
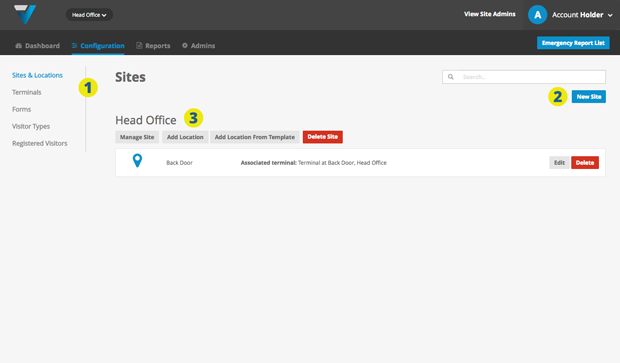
1. Go to Configuration (top bar menu) > Sites & Locations (side bar menu).
2. (Optional) If the new location is at another Site, you can add it by clicking the Add Site button.
3. Click the Add Location button.
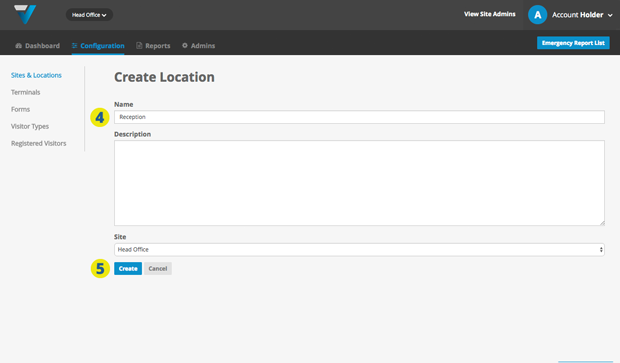
4. Enter the name of the location.
5. Click the blue Create button (at the bottom).
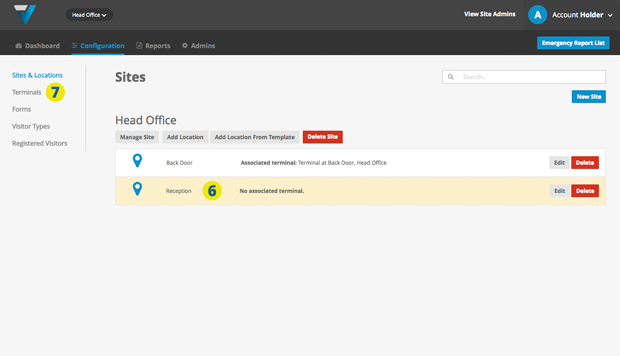
6. Back on the Sites & Locations page you will see your new location has appeared in the Locations listing.
7. Go to Configuration (top bar menu) > Terminals (side bar menu) page.
Meanwhile on the iPad, once the VPass App has been downloaded, should look like the image below (left). Enter your admin account email and password and touch SUBMIT (8). The iPad should then look like this (9).
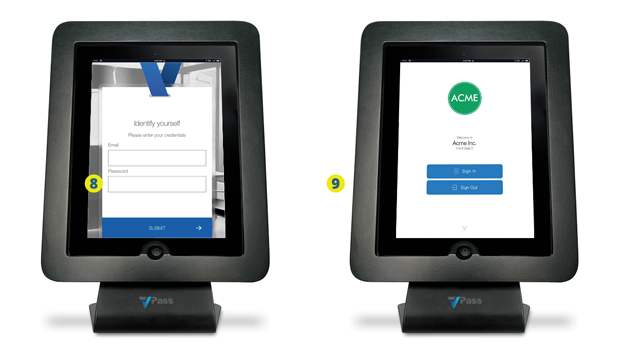
The home page of the iPad should come up with the Location listed in small text.
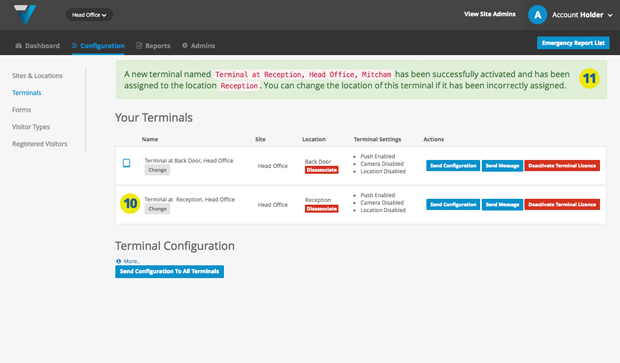
Meanwhile on the Terminals page, the new location will appear in the listing (10) along with a notification (11).
Advanced Users: If you need to track what iPad is at what location you can fill out the name column by following these steps:
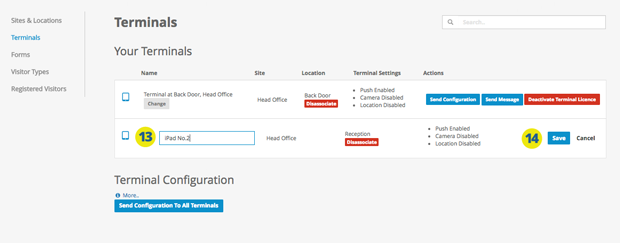
12. For the record you want to alter, in the Name column, click Change.
13. Enter the new Name.
14. Click Save.
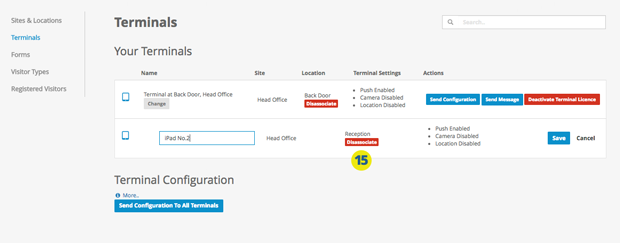
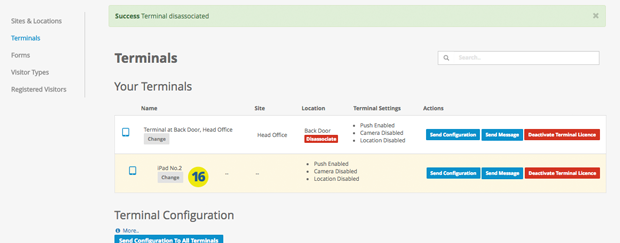
15. To ensure the new name updates, click Disassociate.
16. Click Change.
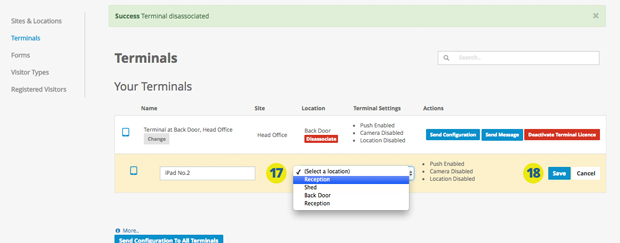
17. Re-select the correct Location from the dropdown.
18. Click Save.
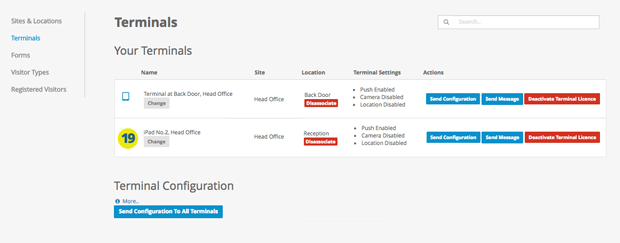
19. The correct name should now be listed here.
043