Forms are made up of fields and are used to collect the information you require from your visitors. To create a form…
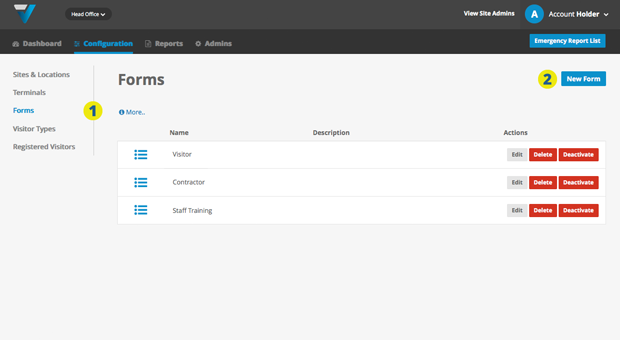
1. Go to Configuration (top bar menu) > Forms (side bar menu).
2. Click the New Form button (top right).
3. Name your form. Most probably it will be the same as the Visitor Type it is for, but the name may also include whether it is for sign in or sign out purposes only.
4. Elect whether you want to collect the visitors signature or photo

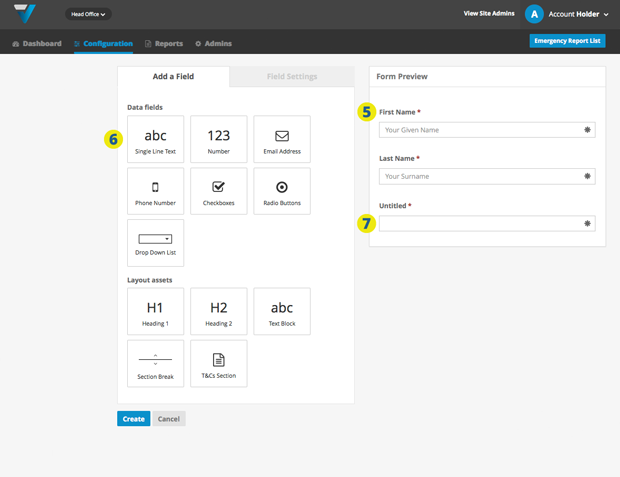
5. The first two fields are default fields that cannot be deleted, but are editable.
6. The list of available field types are listed in the Add a Field tab. Apart from a simple text field, they include:
- Number (user sets a number by pressing up or down arrows)
- Email Address (user is assisted in entering an email address into the iPad by having relevant keys available in the keyboard such as the @ key)
- Phone Number (user is assisted in entering a numbers into the iPad by having numbers rather than letters come up on the keyboard)
- Checkboxes
- Radio Buttons
- Drop Down List
- Text Block
- Heading 1 (BIG), Heading 2 (not so big), Text Block and Section Break are layout tools to make your form more legible and easy to use
- T&Cs Section will position your terms and conditions on your form page. These terms and conditions are set either in Account > Company Details tab or can be set Site specifically by going to Configuration (top bar menu) > Sites & Locations (side bar menu) > Manage Site.
7. Let say for example you select Single Line Text. The field will appear at the bottom of the Form Preview panel.
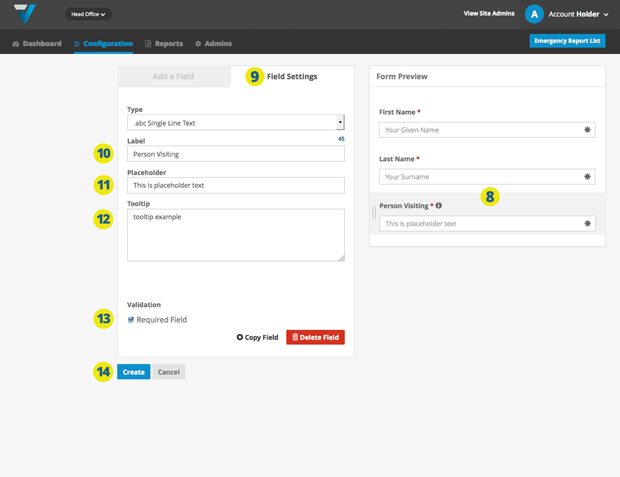
8. To edit the field you just added, click on it in the Form Preview panel (it should be highlighted in light blue).
9. The Field Settings tab comes to the front.
10. Give your field a name using the Label field
11. Placeholder text are bits of example content to offer the user a hint or visual cue to aid form completion.
12. A Tooltip is similar to a placeholder but is less obtrusive. The “i” icon needs to be touched to for the message to be read.
13. A Required Field means that it has to be filled out before the visitor can progress to the next screen. If gathering information from the selected field is optional, de-select this checkbox.
Once you have finished the setup for a field, you can click the Add a Field tab to collect more information from your visitors or if you are done, hit the blue Update button to save your form (14).
15. The Form will appear in the listing on the Forms page.

16. Depending on the strength of your Wi-Fi network, your iPad may take time to update changes made in the admin. To speed the process, you could try the steps listed in this article.
030