1. Go to the Configuration (top bar menu) > People (side bar menu) page.
2. Click the Download CSV Template link.
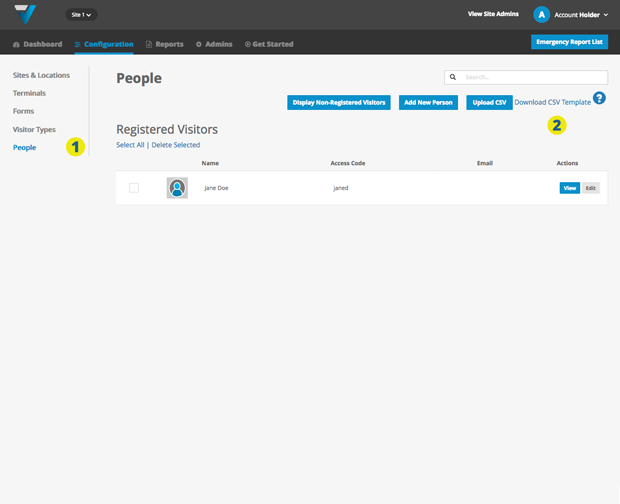
Upon opening the file in your preferred spreadsheet program, add your own row data, but keeping the header row as is.
![]()
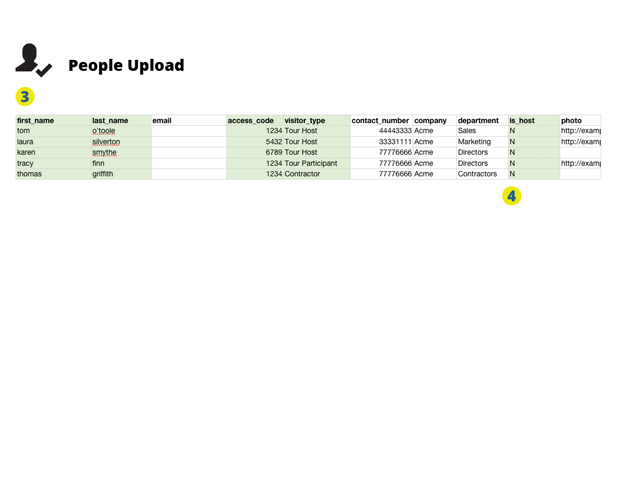
For a People Upload (pre-registered visitors not receiving email notifications)…
3. The columns in green are required:
- first_name
- last_name
- access_code (must be unique)
- visitor_type (a Registered one created on your Visitor Types page)
- is_host
email, contact_number, company, department and photo are optional.
4. Note that the is_host column cells contain “N“.
![]()
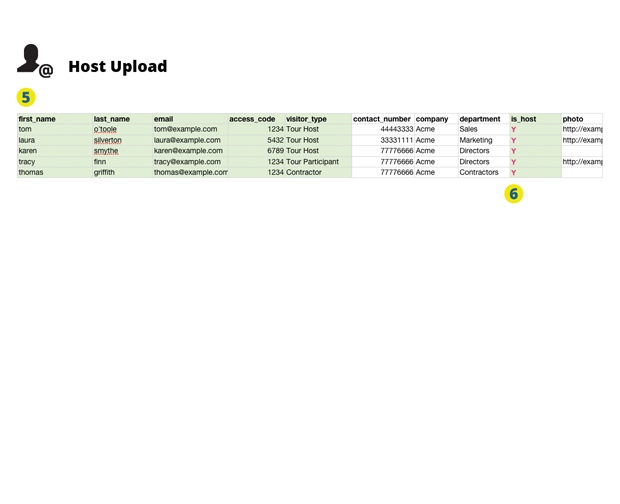
For a Host Upload (Staff receiving email notifications)…
5. The columns in green are required:
- first_name
- last_name
- email (must be unique)
- access_code (must be unique)
- visitor_type (a Registered one created on your Visitor Types page)
- is_host
contact_number, company, department and photo are optional.
6. Note that the is_host column cells contain “Y“.
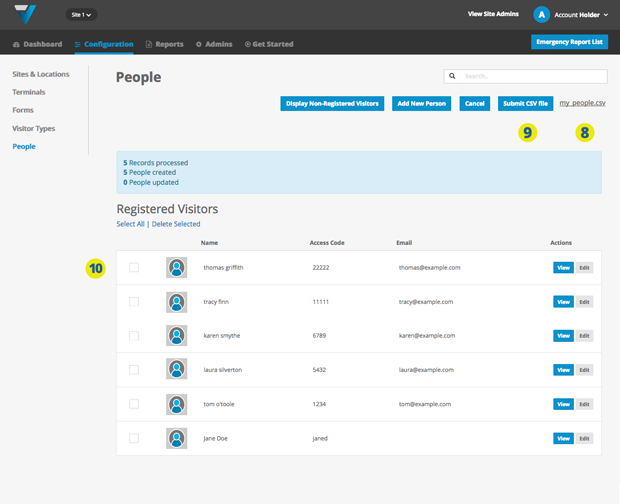
7. Click Upload CSV and navigate to your file.
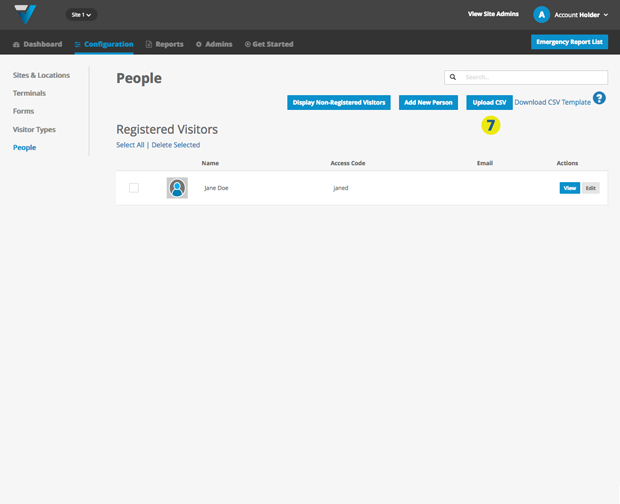
8. Your CSV file name will be listed here.
9. Click Submit CSV file.
10. The upload will commence. Hopefully it goes well and your records will be listed here.
If not, an on-screen error log will assist you in de-bugging your CSV file… or you can contact us at support@vpass.io.
080