Those records created on your Configuration > People page (AKA as Registered Visitors) tend to be regular visitors like staff with whom you are familiar and you don’t have to collect additional information from them at sign in. They just have to scan their QR code or enter a simple code and that’s it.
However what if you did want to collect additional information?
1. Create a form (refer to this article: How do I create a form? ).
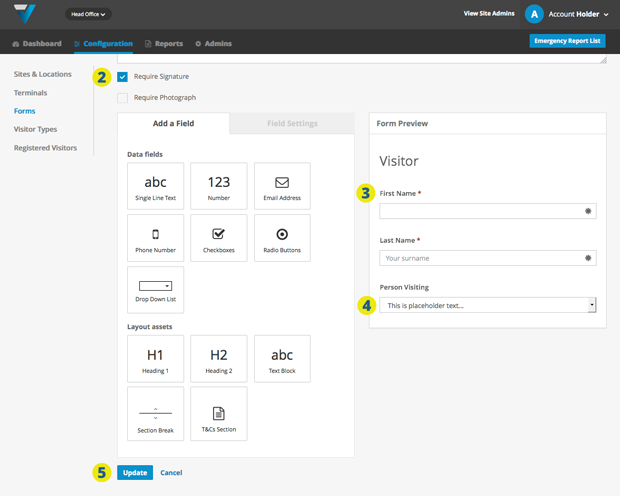
2. You can elect to also collect a photo and signature. The First Name and Last Name fields (3) are default fields that will automatically be populated on the iPad with your Registered Visitor’s First Name and Last Name. Leave these at top of the page but add any additional fields below (4).
5. When you are done, hit the Update button at the bottom.
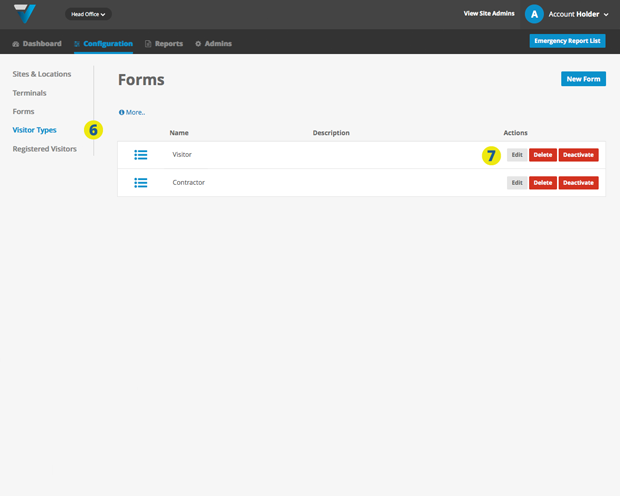
6. Go to Configuration (top bar menu) > Visitor Types (side bar menu).
7. Choose the relevant Visitor Type.
8. In the Forms section (near the bottom), select the relevant Sign in Form and/or Sign out Form.
9. Select the Update button to save the changes.
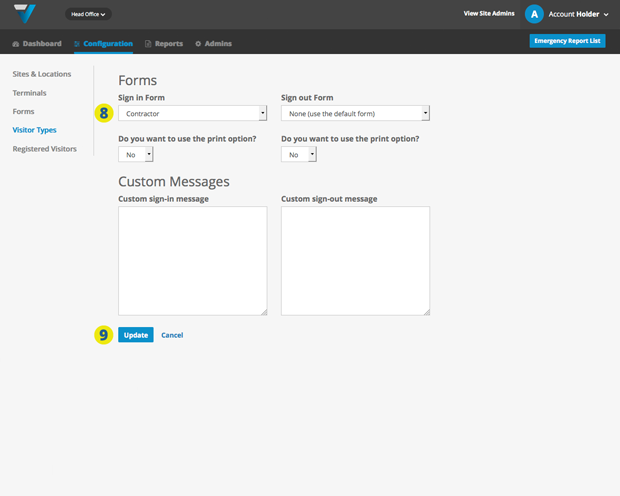
10. Thus, when a Registered Visitor scans there QR card on the iPad, they will also be taken to the Form page and (if selected) the Photo and Signature (if selected) pages before their sign in process is complete.
035