1. Download the Brother Quick Setup Guide here and complete steps 1-9.
2. For the steps below you will need:
- Wi-Fi network name
- Wi-Fi network password (Network Key)
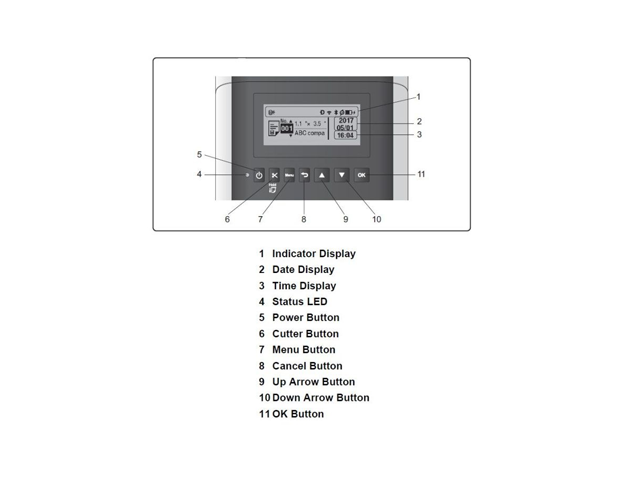 3. Press the [Menu] button.
4. Use the [▲] and [▼] buttons to select WLAN > WLAN (On/Off) > On in the settings menu. Press [OK].
5. Use the [▲] and [▼] buttons to select WLAN > Infra Manual Setting in the settings menu. Press [OK].
6. Your printer will search for available Wi-Fi networks. Remember, your printer and iPad will need to be on the same network.
7. Use the [▲] and [▼] buttons to select your desired network. Press OK.
8. Enter your password.
9. Look in the top right of the screen. Press [Menu] to switch between uppercase, lowercase, numbers and symbols.
10. Use the [▲] and [▼] buttons to select the correct characters.
11. If it connects, it will say “Connected!” Press [OK]. If it does not connect, repeat steps 5 through 7.
12. Press the [↩] button to return to the main screen. You should see the Wi-Fi icon in the top right.
13. The print feature is compatible with all Visitor Types (including Sign in Only and Sign out Only). It needs to be turned on in the VPass admin, Visitor Types page – more information available here:
14. On the iPad ensure that you have the latest version of VPass 2 installed (v1.3+).
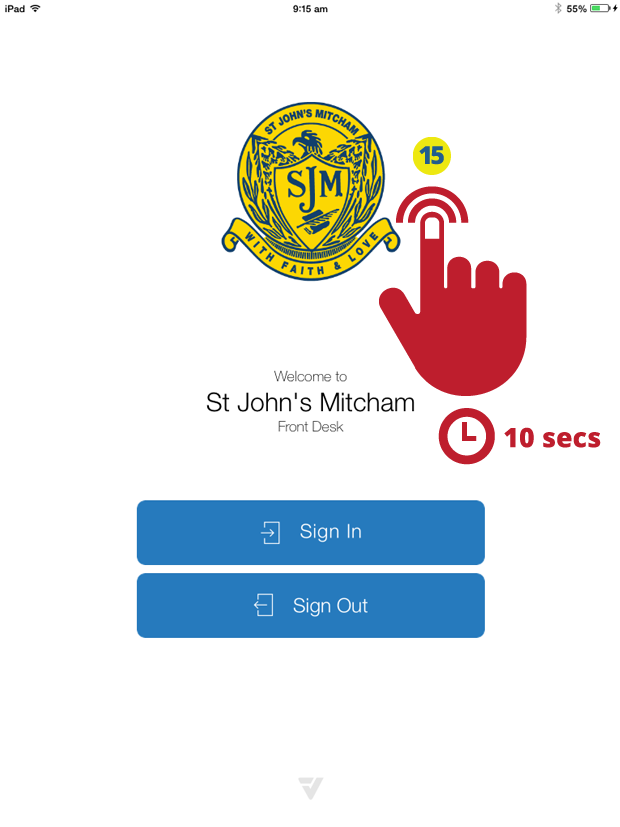
15. On the iPad, go to the VPass App homescreen and touch anywhere and hold for 10 seconds.
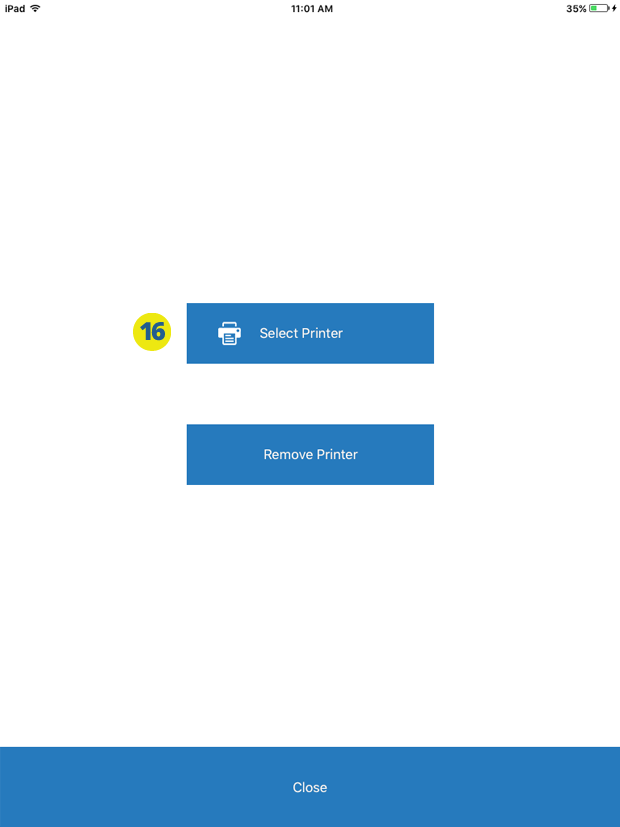
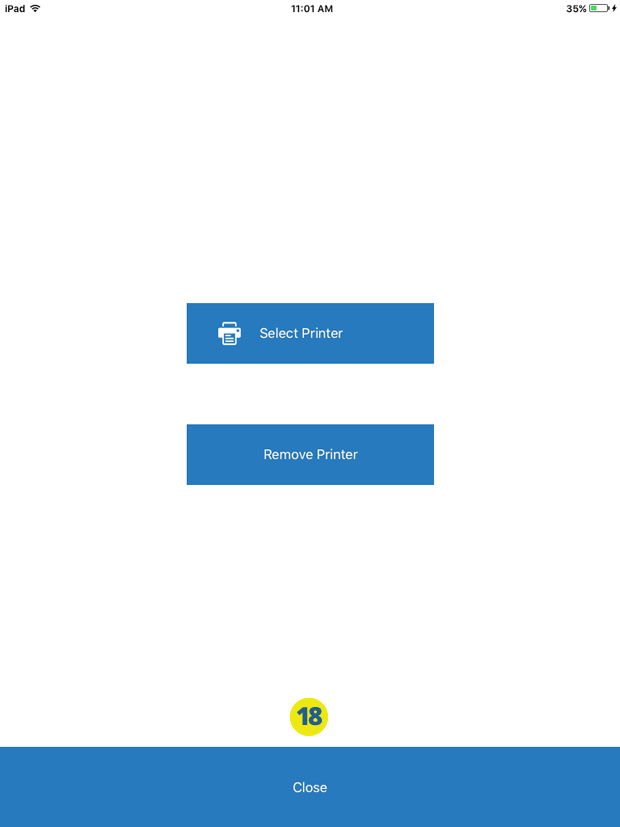
16. The print setup screen appears. Touch Select Printer.
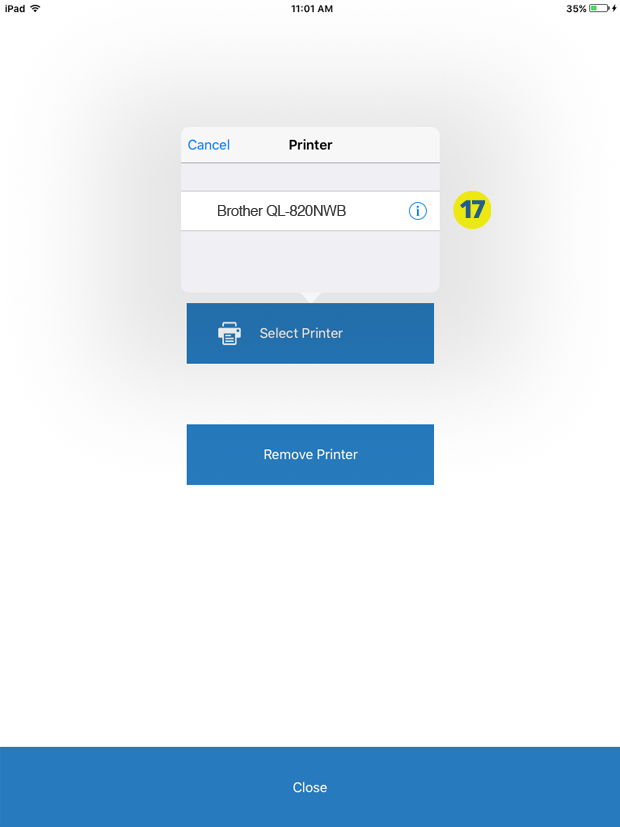
17. Select Brother QL-820NWB.
18. Touch Close.
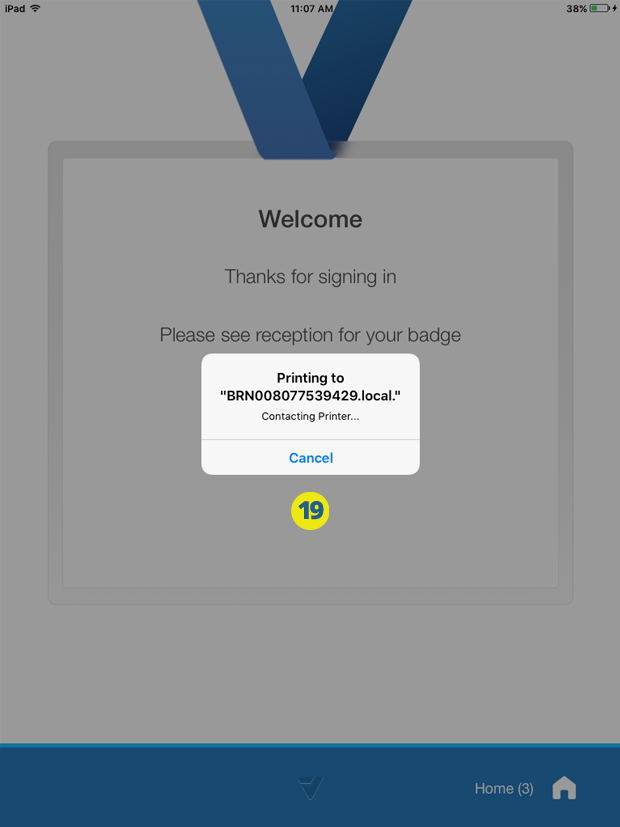
19. When the visitor signs in and out of one of the visitor types configured to use the printer, they would fill out any forms and signature page as normal. At the very end they will come to this screen (below) with a message saying printing is underway. The badge should print within 20 seconds.
20. The printed badge will print the Date, Time, Visitor Name, Organisation Name, Visitor Type and Custom Field of your choice from the drop down options. For Auto Generated Visitor Types a Badge Number is also added in the bottom right.
[OPTIONAL]
21. If you get high volumes of sign ins at certain periods, it may be beneficial to check the printer is configured to use IPv6. This will greatly improve print times.
For configuration instructions, please refer to this article.
075