![]()
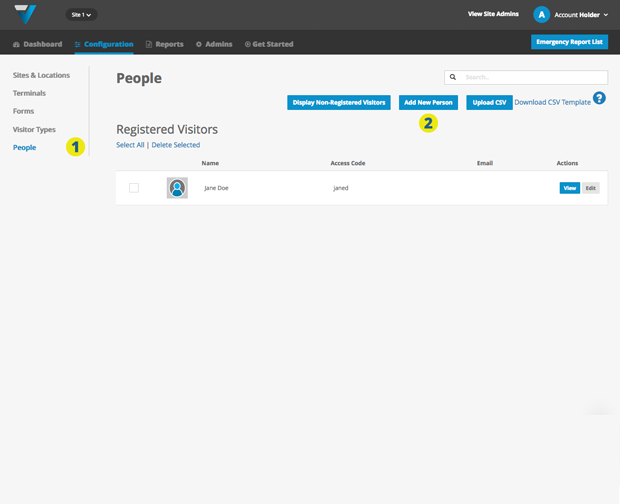
1. Go to the Configuration (top bar menu) > People (side bar menu) page.
2. Click the Add New Person button.
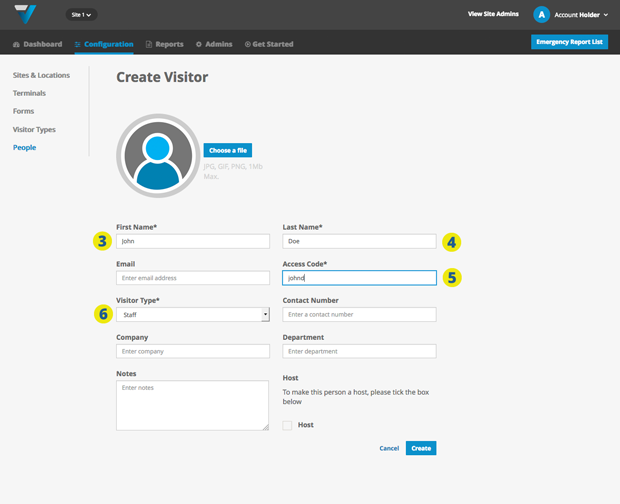
3. The settings page will come up. Enter the person’s First Name.
4. … Last Name ….
5. … and Access Code. This access code will allow Registered Visitors such as Staff or any other Regular Visitor Types to sign in and out.
6. Be sure to select the correct Visitor Type (it needs to be one that has been set up as Registered in the Visitor Types page).
All other fields are non-required if setting up a Person to sign in using a Registered Visitor Type.
![]()
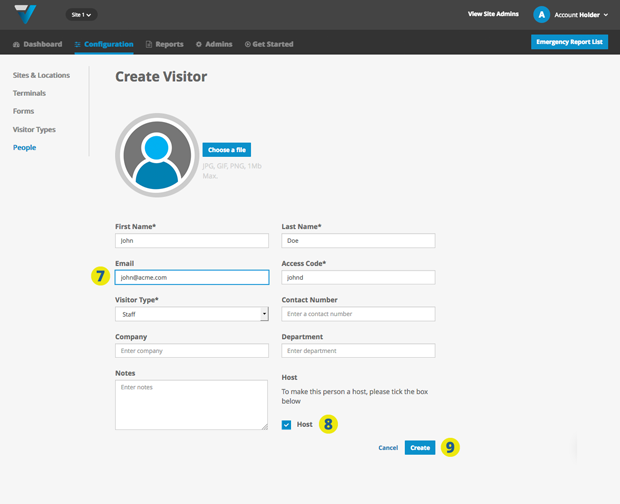
7. If however, you require a person to receive an email notification (a Host), then it is necessary to also enter an email address.
8. Also, check the Host checkbox.
9. Click Create.
10. The new record will appear here.
11 [OPTIONAL]. If you have a large number of records to add, you can download this sample csv file and use it as a template for your own upload.
At a minimum the following columns must have some data:
- first_name
- last_name
- access_code
- visitor_type
- is_host (either “Y” or “N”)… “Y” being for Yes, “N” being for No
12. Click the Upload CSV button and your records will be added to the list.
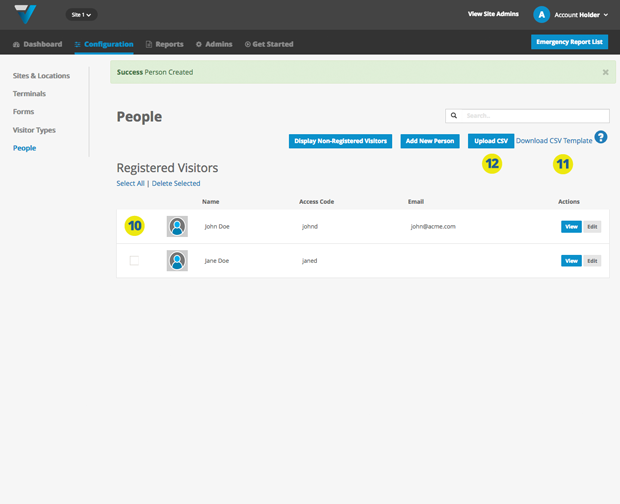
TIP: If a person doesn’t appear in the list, click the grey Display Non-Registered Visitors button and the listing will enlarge to show them in a separate section underneath. Scroll down and you should be able to locate the record. If you edit it, you may well notice that it has the incorrect Visitor Type.
078