![]()
A Visitor Specified Visitor Type means that the badge number for a person signing in is entered into the iPad by the Visitor themselves. This badge number would most likely be on a badge given to them by reception. To create such a Visitor type…
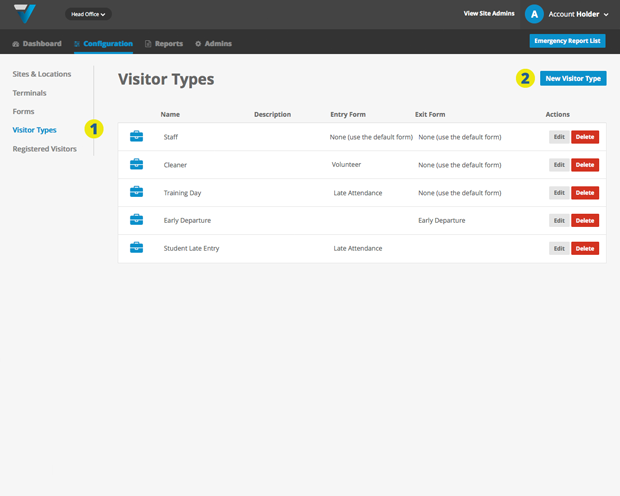
1. Go to Configuration (top bar menu) > Visitor Types (side bar menu).
2. Click the New Visitor Type button (top right)
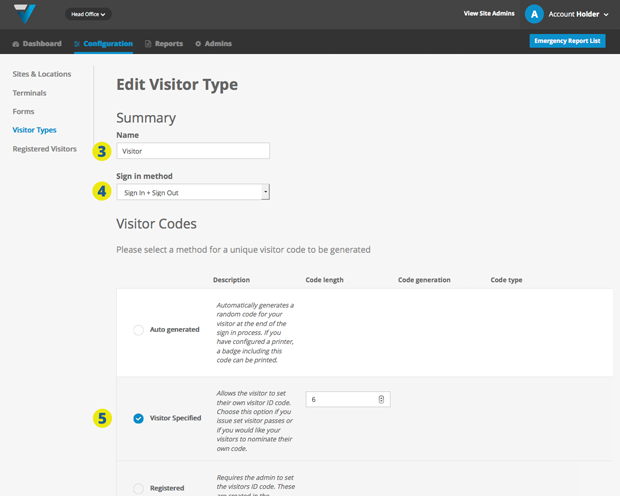
3. Name your Visitor Type. Most probably it will be similar to the Form it uses.
4. Elect whether your visitors will be:
- Signing in and out (Sign In and Sign Out)
- Only signing in eg: a conference registration or student late pass (Sign In Only).
- only signing out eg: staff or student early departure (Sign Out Only).
5. Choose the Visitor Specified radio button and select the number of digits your code length has.
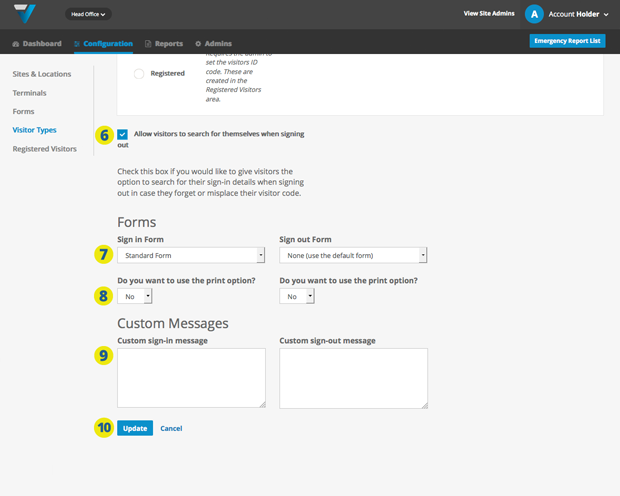
6. Elect whether you want visitors who may have forgotten their code to be able to search for it when signing out. Can be pretty handy.
7. Earlier you would most likely have created a Form for use by this Visitor Type. Set it as the Sign In Form. Generally the Sign Out Form is set to “None (use default form)” as you don’t need to collect any information as people sign out, only their badge number.
8. The print option is available for this Visitor Type but generally not used.
9. Custom messages appear above the signature box and are only visible if you have elected to collect signatures as visitors sign in or out.
10. Click the Update button. Your new Visitor Type will be listed in the Visitor Types page of your admin plus will appear shortly on the Sign In and/or Sign Out page VPass App.
16. Depending on the strength of your Wi-Fi network, your iPad may take time to update changes made in the admin. To speed the process, you could try the steps listed in this article.
037