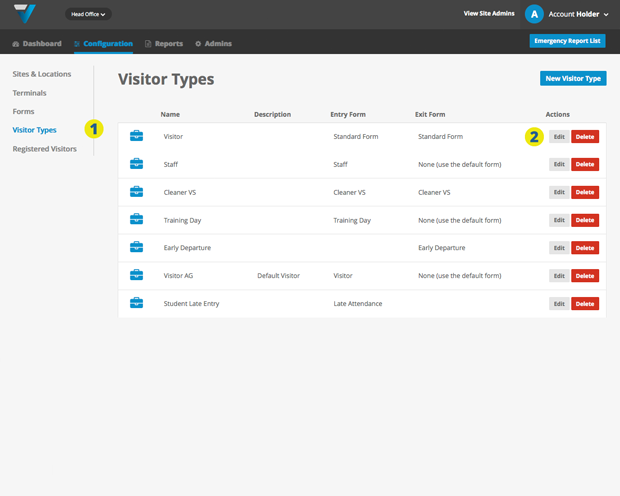
1. Go to Configuration (top bar menu) > Visitor Types (side bar menu).
2. Edit the Visitor Type you want the custom field to appear on your badge

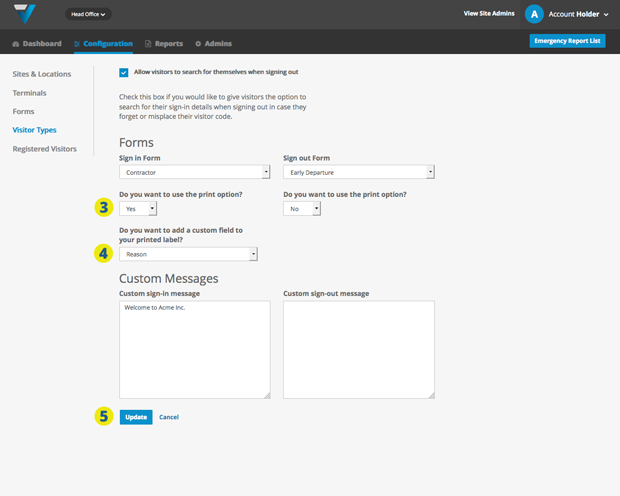
3. Make sure Do you want to use the print option? is set to Yes.
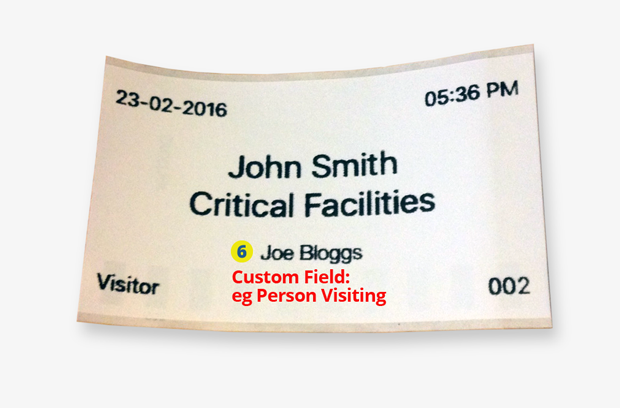
4. On your printed badge, you can elect to have printed a custom field as well as Date, Time, Visitor Name, Visitor Type and Badge Number. This custom field can be sourced from the range of fields created on the Sign In Form (eg: the Contractor Sign In Form is being used in the screenshot below).
5. Click the Update button.

6. The custom field will appear in the lower middle of the printed badge.

NB: Depending on the strength of your Wi-Fi network, your iPad may take time to update changes made in the admin. To speed the process, you could try the steps listed in this article.
071
